
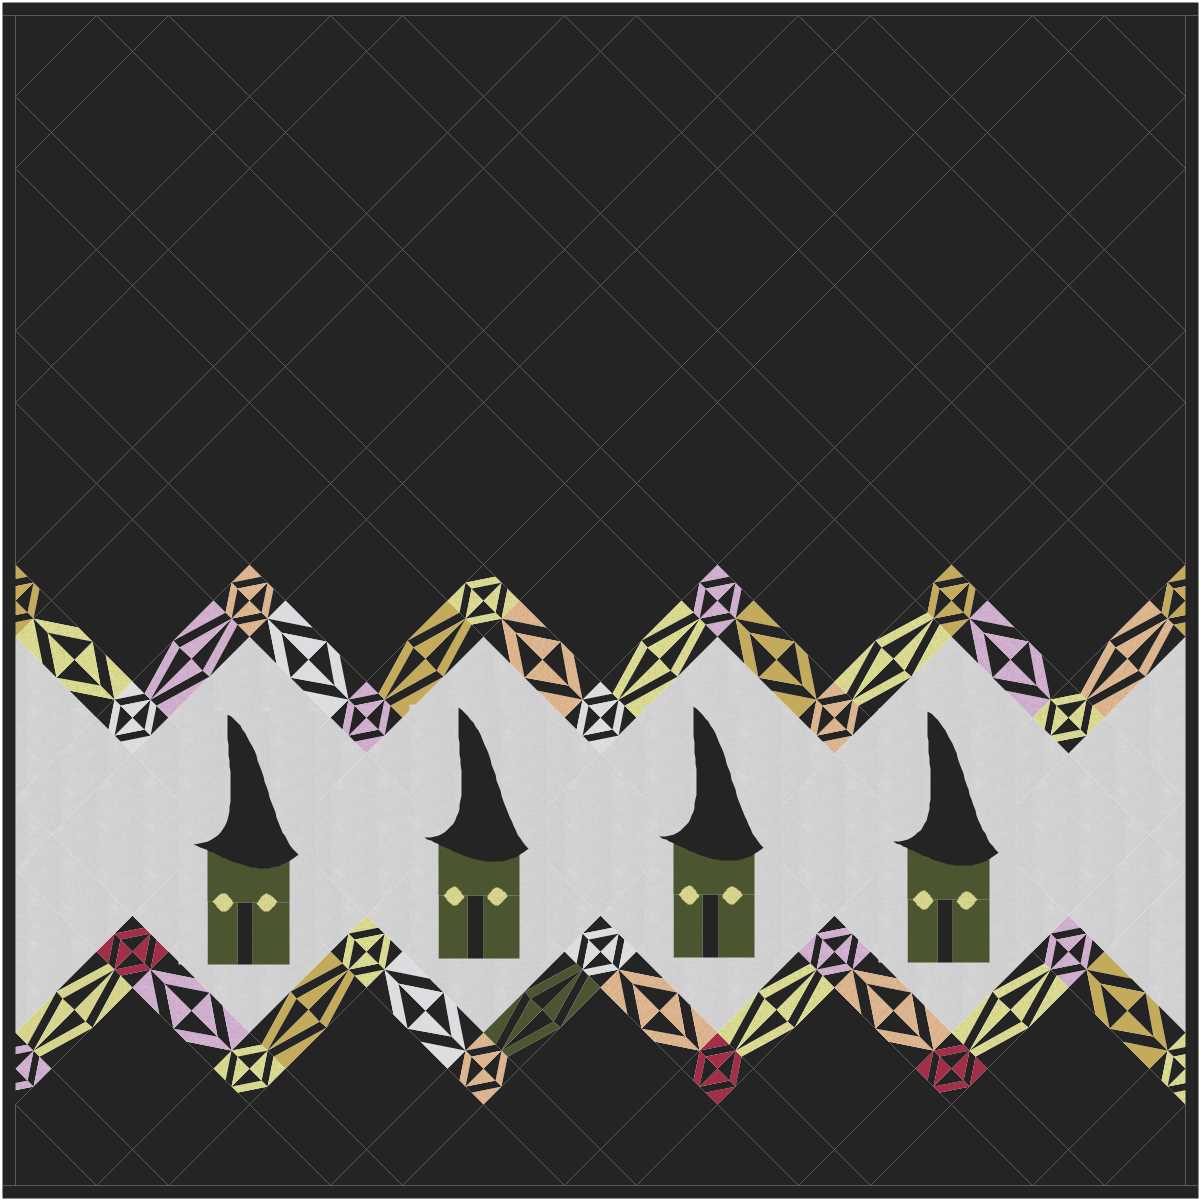
Thank you Wicked Wendy for leading us on a blog hop featuring fabric from the Black Cat Crossing by Maywood Studio. Thank you Madame Samm for organizing such wonderful hops with interesting themes. I promised a Halloween quilt and a tutorial. Today’s quilt is a Quilt Design a Day finish–yippee!! My first finish from the designs which I have posted on Quilt Design a Day is from September 11, 2014. Here is the design as I originally posted it:
And here is the finished quilt:
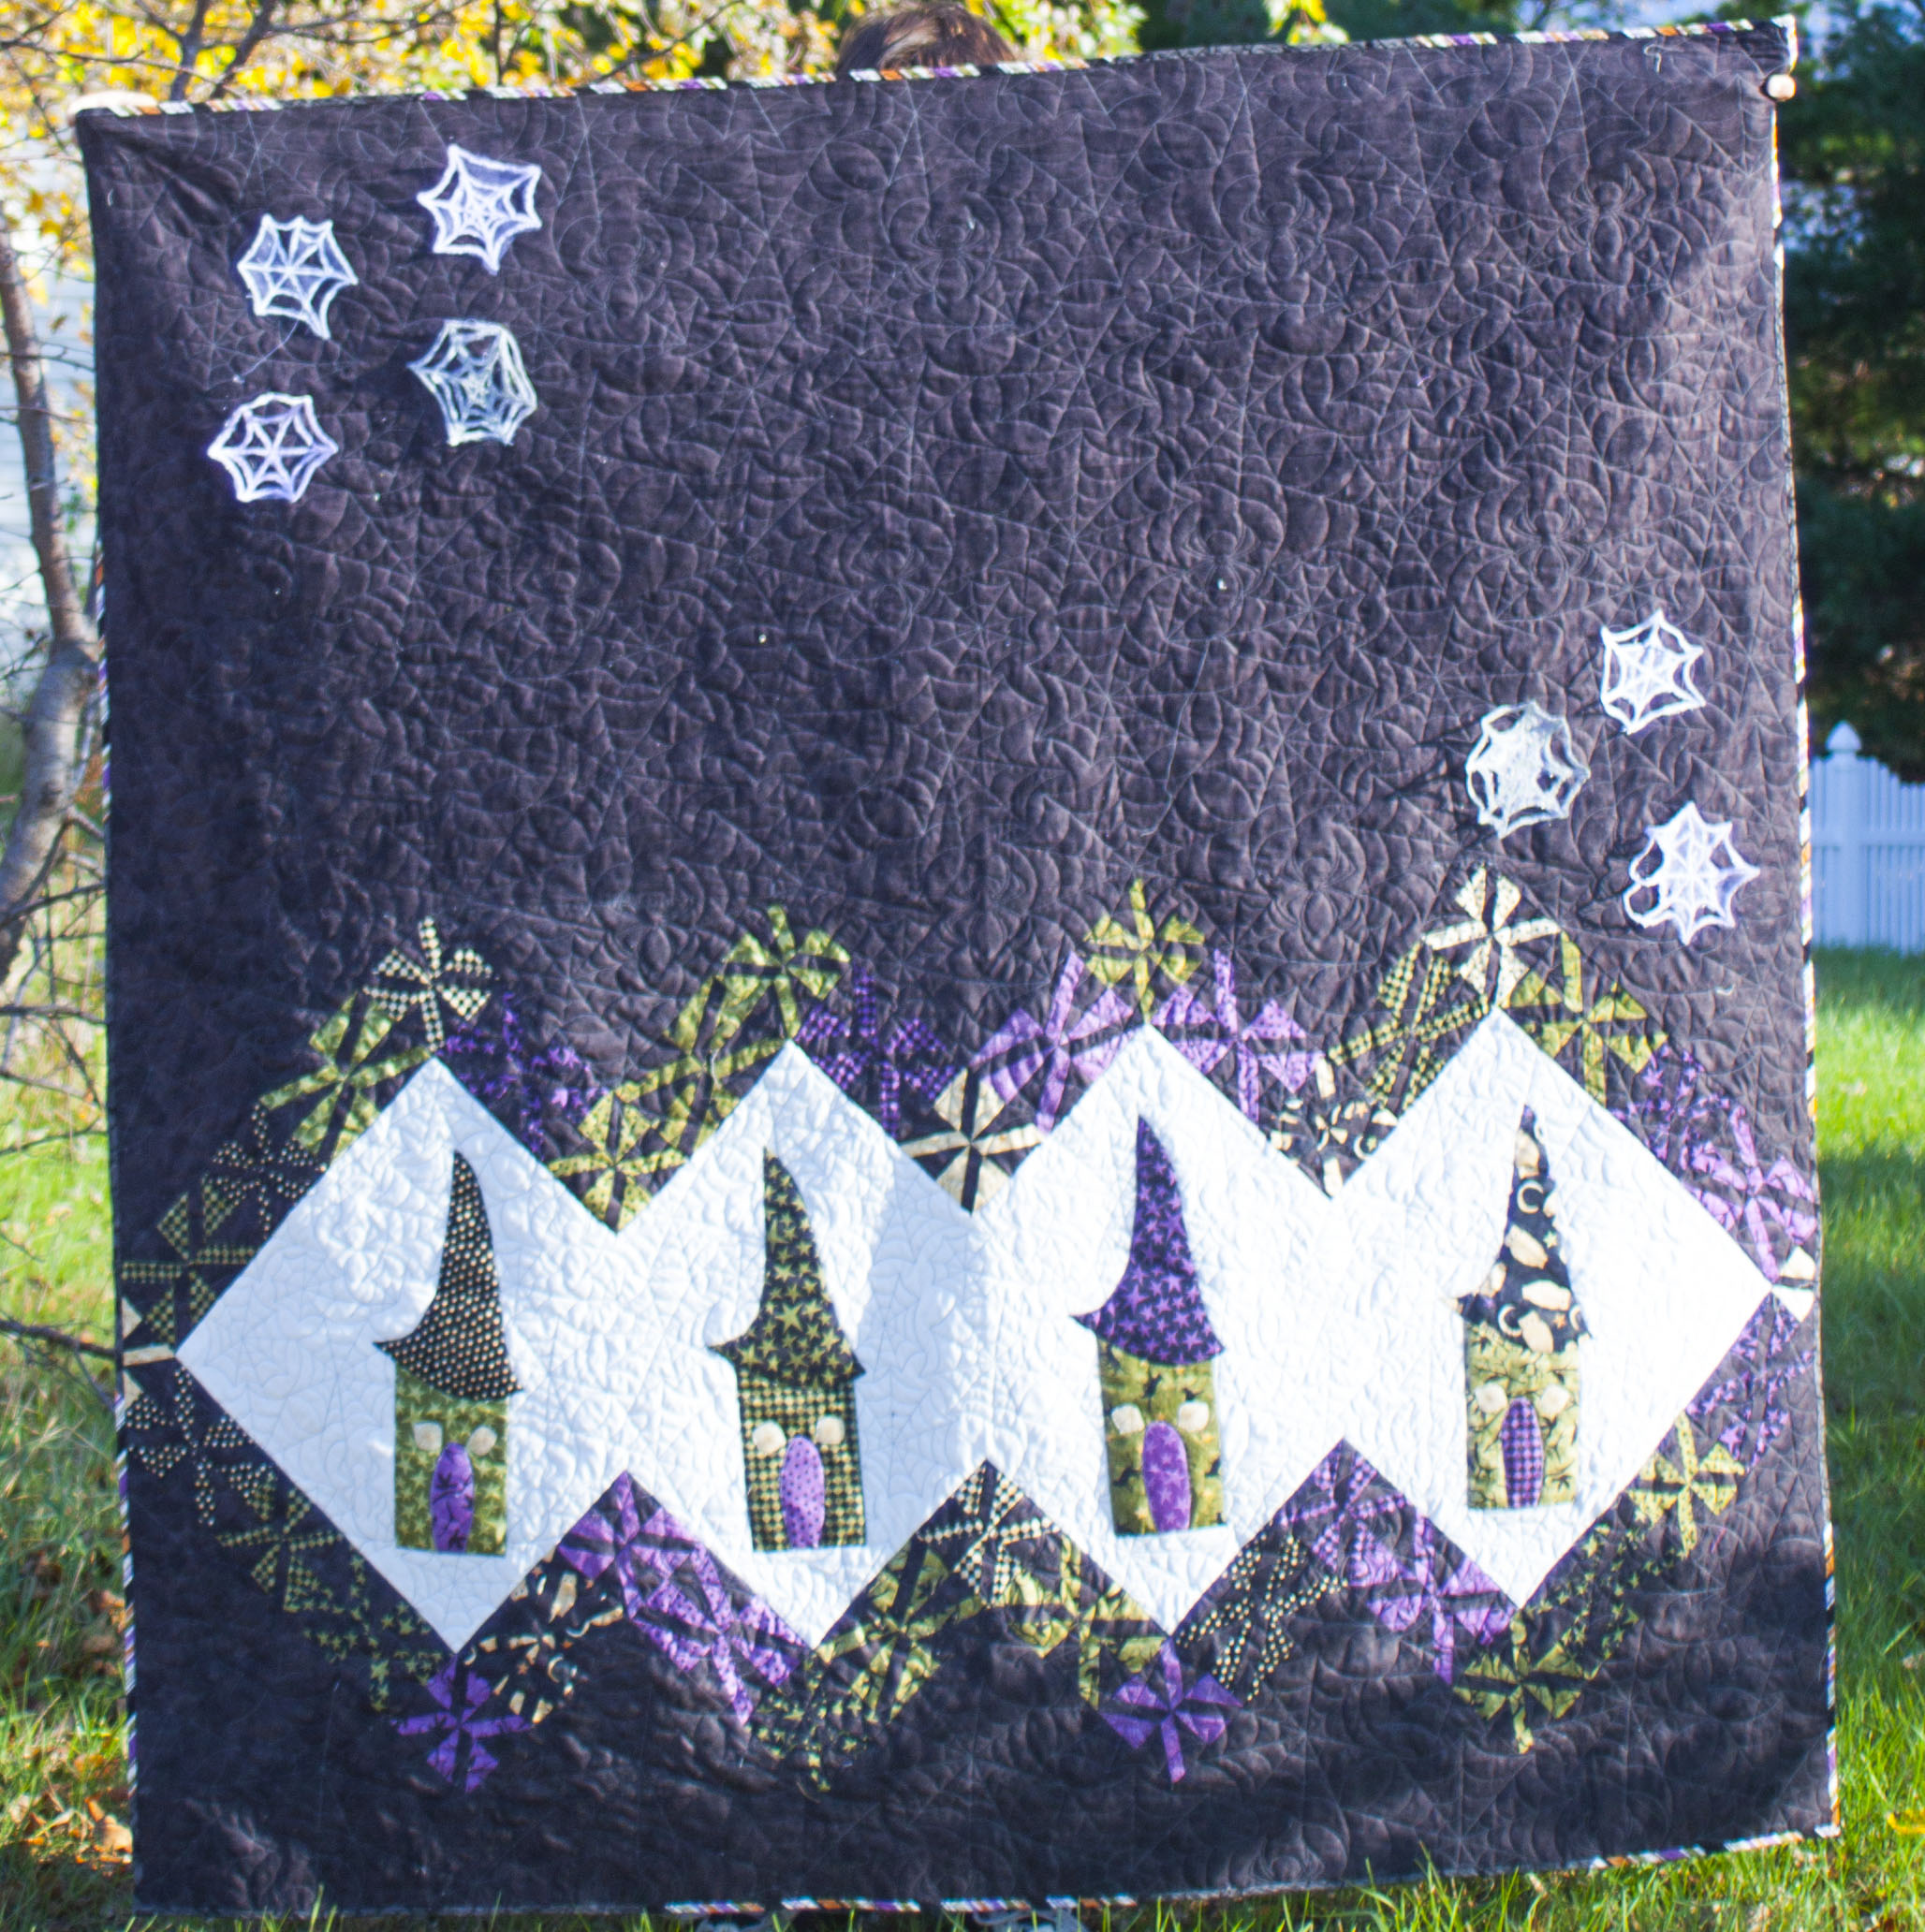
A closer look at the scary/whimsical witch-y houses:


I fussy cut the eyes/windows in the witch-y houses so that the spiderweb prints would look like eyes. Each house has a door/nose using a purple background print, the houses/faces are a green print and the roofs/hats are a black background print. I used fabrics from the Black Cat Crossing line and some solids which were in my stash. The web quilting design was by Jessica Schick. The spiderweb embellishments were free-motion free-standing lace. They were definitely a spooky addition and easy to make.
To make the webs I started with Aquamesh Plus, a water soluble stabilizer, Bridal organza and embroidery thread.

I set up my machine for free motion stitching, lowered the feed dogs, installed the free motion foot, changed my needle for an embroidery needle and installed the straight stitch throat plate. Please consult your sewing machine’s manual for how to do this.
 In order to stitch the colored webs, I threaded both white and colored threads through the machine as if they were one thread following the same path. Both threads should be threaded through the one needle. Please consult your owner’s manual if this does not work on your machine or if you have excessive thread breakage. I stuck the adhesive side of the stabilizer to the bridal organza ribbon (after removing the wire from the ribbon) then I hooped them together in an embroidery hoop. I used a 7 inch diameter hoop.
 If you are insecure with your free motion stitching drawing ability I suggest that you draw your web on the stabilizer/organza with a water soluble marker. I drew my first web with a non-soluble pen and it transferred to the thread when I dissolved the stabilizer. The resulting web looked very dirty. After drawing a few webs I felt comfortable enough to go ‘off-road’ at the sewing machine. The first stitches are an ‘asterisk’ shape which form the skeleton of the web.

I found that setting the needle speed at approximately midway between the slowest and fastest kept thread breakage at a minimum. The needle will be going fast, but your movements should be slow and deliberate. First lay down the base stitches–I stitched the lines upon which I would build the design. I usually went over the lines twice. Next I went over the spiderweb ‘straight’ lines with a tight looping stitch.
 In the above picture you can see both the straight lines and the beginning of one line of the looping stitch. Watch that you do not have excessive thread build-up in one place, you don’t want to pull your needle out of the needle bar or break your needle. The width of each line when finished should be 1/8 inch. When stitching the outer lines of the web be careful not to bump into the hoop with the presser foot. Also I noticed that my hoop was not travelling smoothly because my sewing surface was not completely flat–I used my Silicone Slider to fix that issue.

After stitching the skeleton of the web and the outer shape I stitched the inner lines.

Once you have completed stitching the web, remove it from the hoop and following the manufacturer’s instructions dissolve the water soluble stabilizer.

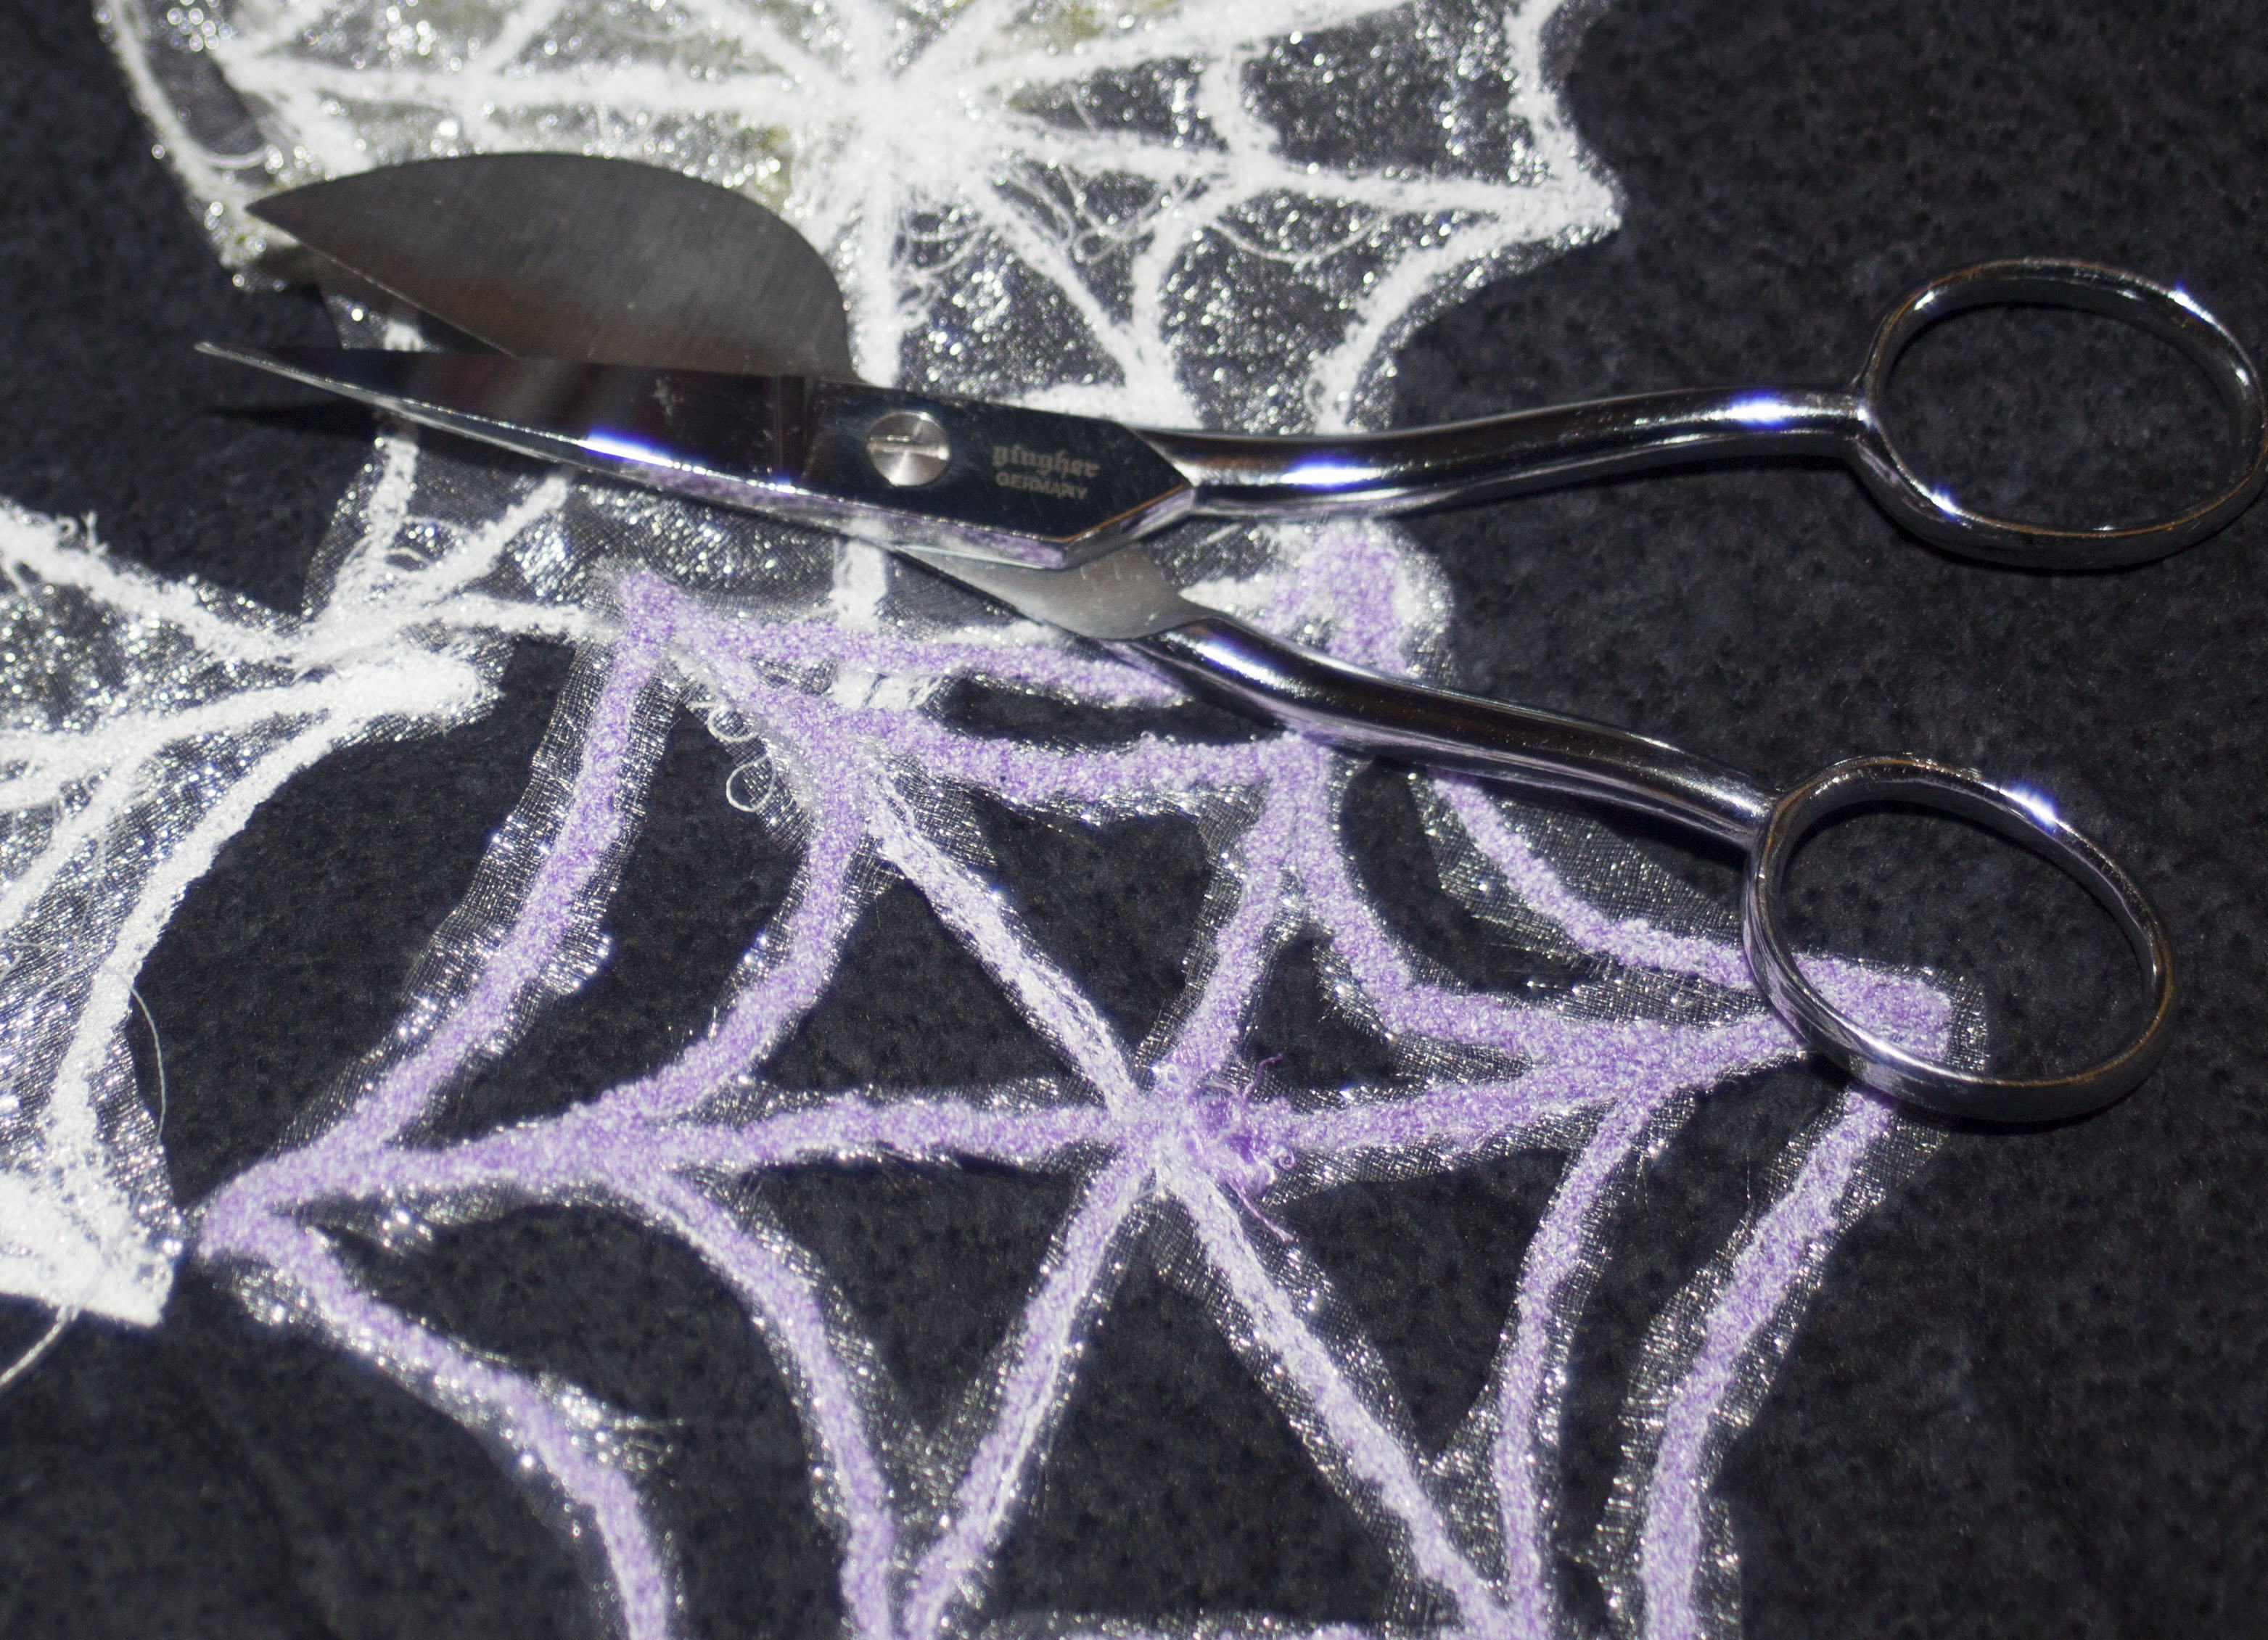
Remove the webs from the water, dry them in a towel and press them. I then carefully cut the organza out of sections of the web to add to the ‘webby’ illusion. Arrange them on the quilt and tack them down with a few stitches.
Thank you so much for your time. Please visit the other blogs on today’s schedule:
Have a quilty day!!


Absolutely Adorable! I just Love the Witchy houses! Thanks for the Tute on the Spider Webs, very creative! Thanks for sharing your Spooky Project with us!!
Huggs, Nancy
Wickedly Wonderful Wow! Your Black Cat Crossing Quilt is stunning and the addition of the spider webs in 3D is brilliant. Thank you sew very much for participating and hopping. Creative Black Cat Crossing Bliss…
So beautiful. I love the spider web quilting. It really looks fantastic on your quilt. You did a great job. Thank you for the tutorial. I would love to try it sometime.
This is wonderful! Thanks for the tutorial and sharing your awesome creation with us today.
Very cute project. Very cleaver way to make the webs. Wonderful work!
Fabulous quilt and such a neat design. Witchy houses was brilliant! The spider web addition was great; thanks for sharing your steps to achieving those great results.
Very cool quilt. Love the addition of the spider webs.
Wonky, witchy, wonderful.
Very Very Creative!! Gooood job!!! Love the Webs!
What a fun and unique addition – love those webs!
Thanks for the great tutorial. Nice stitching I love all the spider webs. Cute scary houses!
How creative, love your spooky houses and the spider webs are awesome!
I just love your witchy cottages! So, so cute – and the embroidered webs too! blessings, marlene
I like the spider web free motion quilting.
Oh, how fun! Love those witchy cottages and so impressed with those webs. Wow. Too cool (and tempting for me to try… ;o). Thanks so much for sharing your creative talents (and the mini tutorial for those webs).
The spiderwebs are a really cool effect, and I am glad those witchy eyes won’t be watching from my sofa
Great project! Love the creativity of your spiderwebs>
Now I know where the witches live! How cool is this. Great tut for the spider webs. Thank you
great technique there on how use stabilizer. nice project
Luv Those spider webs.
What a wonder with all those webs. A great Halloween quilt and very well done!! Thanks for the tutorial about the webs. Great idea!
Fantastic colors! It’s a great quilt.
Thanks for sharing the steps to your project. I definitely learned something. Nice work!
Those little houses are so cute. Love them.
Welcome to our hops!! Have you hopped with us before? I don’t remember but then my memory is a tad bit short lived these days. Your spider webs are unique…very nice.
Gmama Jane
Love those creepy spider webs! 🙂
[…] with crackled eyes. I made free-motion free-standing lace spider webs, there is a tutorial here. The spider web quilting is a design by Jessica […]
Great witchy houses!
Love these adorable witchy houses with windows that DO look like eyes!! I so thought that!
These houses are fantastic! The perfect amount of spooky! Great pattern!
Hi!!!! Beautiful quilt!!!! Very fun!!!! Thank You
Beautiful quilt! Thank you for the spider web tutorial!
Your witchy houses are so fun. I LOVE the spider web quilting! Such a fun quilt.
This is really fabulous!
Your witchy houses are so happy and fun
Very nice houses and your quilting is creepy good!
What a great quilt…those houses are wonderful! Thanks for showing us so much of the process!
Love your whimsical houses. Thanks for sharing how you went about creating it.
Love your witchy house. And the quilted webs are sew interesting. Thanks for the lesson.
Spooktacular and whimsical houses!! Love those spider webs!! Thanks for the inspiration!! Happy stitching!!
What a creative quilt! Thanks for sharing how you made the spider webs. I like the whimsical look of the houses.